Showing posts with label Christmas Town. Show all posts

Word Personality

>> Monday, May 7, 2012

Happy Monday!

I hope you had a lovely National Scrapbook Day weekend and was able to create among your scrapbooking friends, near and far. I didn't really get the chance to do much creating, but I did brainstorm and sketch ideas I want to try. One of those ideas is to play with words using negative space throughout the background.


I used my daughters name to spell out her personalities. This is always a fun way to use up lots of space on a page and a fun way to create your title. When I've done this before, it was always with stickers. This time around, the trend is using a die-cut machine.


For this layout, I used my Cameo Silhouette to cut out the words. I used my daughters favorite colors, pink & green, to highlight each word and used a more subtle complimentary shade of color to highlight her full name separately. This required a variety of pattern papers used from five fabulous collections, which is always fun to mix old with new.
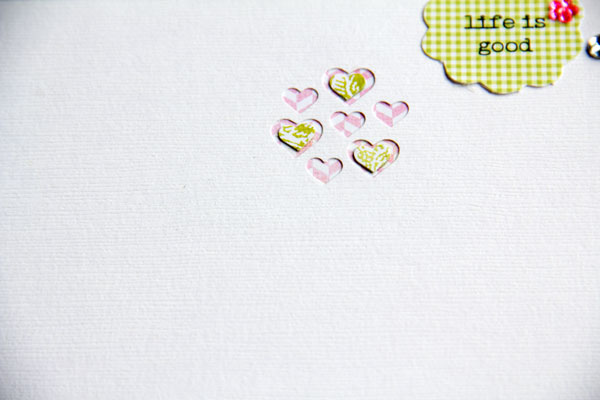

I also used a small punch to create a small accent area and embellished around it and backed it with more pattern paper and pearls.


While the words were cutting, I made time to select the papers & embellishments I wanted to use to complete the project. This allowed me to complete my layout faster and I'm very pleased with the end results. I also plan on using the leftover letters for either my project life or future scrapbook project. Can't let all those letters go to waste.

Have a great week & happy creating!


Lily Bee Supplies:
Pattern Paper:
Happily Lost-Hammock, Picket Fence-Cottage Garden, Handmade-Thimble, Handmade-Pink Lemonade, Victoria Park-Grand Theatre, Victoria Park-Wortley Village, Buttercup-Queen Bee & Statinery-Pear
Stickers:
Buttercup Mixed Cardstock Stickers
Bag of Bits:
Victoria Park & Handmade
Chipboard Stickers:
Christmas Town

Read more...

Day 17: Favorite Ornaments

>> Saturday, December 17, 2011

Hi everyone-  It's Jenni here welcoming you to Day 17!  It's hard to believe how fast December is flying by!!!

One of my very favorite Holiday traditions is pulling out the box of ornaments from our storage room.   Our Christmas tree is very eclectic-- many mix matched ornaments that represent an event, milestone, travel destination, or memory.   It's almost as if each ornament has a story of it's own and I love nothing more than pulling out each and every ornament and "revisiting" those stories.  In the end our tree hangs with ornaments that tell many stories and memories-- and it truly makes my heart happy.


I thought today I would share with you a simple layout I made that helps me tell the "story" of our ornaments.  It will be great to look back at this throughout the year!!   The front shows 11 ornament photos that are punched with 2" square punch and placed in a grid.   I used the Jingle ABC stickers  to number the ornaments.  Instead of adhering the photos directly to the kraft cardstock, I actually trimmed a regular office supply file folder down to an 8.5" x 6.5" file and placed the photos on the front of the file folder.


I then covered the interior portion of the file folder with papers from the Memorandum line.   This gave me plenty of room to journal the background and stories of each ornament.  I LOVE that I have this written down and it can be passed down for a long time.

I actually photographed the ornaments last Christmas, and I am SO glad I did, because one of my favorite ones broke as I took down the tree last year.  I was heartbroken, but so thankful I at least have a photo memory of the ornament and now the story behind it written down.

I know you are super-busy right now, but this is just a friendly reminder to take photos of your ornaments on the tree!  This is a project you can complete well after Christmas and enjoy throughout the whole year.

Lily Bee Supplies Used:
Jingle: ABC Stickers, Mixed Cardstock Stickers, Mistletoe
Memorandum: Grapefruit, Payday, ABC Stickers,
Christmas Town: Night Divine, Chipboard Stickers.

Read more...

Thoughts on Journaling

>> Tuesday, October 18, 2011

I have to admit, I often leave my journaling last when creating a layout. That doesn't mean I don't like journaling (i love it) or that i don't have much to say (i usually have too much to say), but when it comes to design, it can be hard to determine where and how much to write.

PLwk7 005 copy

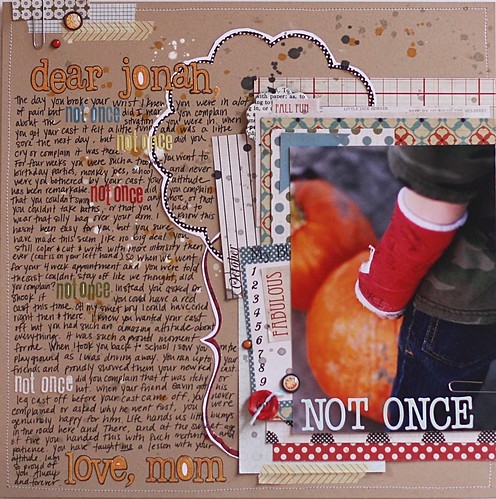
My son recently broke his wrist at school and the story I wanted to remember was not the where and how, but really, how he responded to this little trial in his life. For a five year old, his attitude was truly remarkable. So I decided to layer my photo and embellishments on one side of the page, and leave the rest of the page for my journaling.


I wrote him a letter and incorporated ABC stickers from the Harvest Market Collection within my journaling. It helps the eye not get "lost" among all those words. I also created some of my own embellishments by trimming the Die Cut Frames from the Christmas Town Collection! Layering the frames between the photo/embellishments AND journaling allowed for everything to flow together (instead of just being side by side photo and journaling).

Don't be afraid to spend some time (and page space) and write out your thoughts! You really can have BOTH words and products in one page!!

Lily Bee Products Used:
Harvest Market- Peach Crisp, Black Licorice, Hayride, Squash, Harvest Blue, ABC stickers, Mixed Cardstock Stickers, Index Journaling Cards.
Memorandum- Boardroom, Whiteboard, ABC stickers
Christmas Town- Die Cut Frames


Read more...

A Little Upcycling

>> Tuesday, October 11, 2011

Hey everyone, Cindy here with a simple layout showcasing the use of negative space from a sheet of chipboard. Since I print from home, I tend to have an excessive amount of random photos laying around. To keep my pile from growing, I give most of the extras to my daughter for her own scrapbook projects. But there are always a few I love so much I couldn't resist using them again on a layout.


I wanted to create a frame within a frame on this layout. Used my sewing machine to create a stitched border on the polka dot background and framed a variety of photos behind the open spaces of the chipboard.

Then the fun part, embellishing each open space with layered elements using punches, brads, buttons & jewels. Adding the embellished journaling card and flower accent gave the page that extra burst of texture, dimension and balance I was looking for. I love how the black & white photos mixed with color photos flows with the color palette.
So, instead of throwing away your leftover packaging items that normally aren't meant to be used on a layout or project, step out of your comfort zone. Keep them & use them. CHEERS!


Lily Bee supplies:

Patterned Paper:
Lemon-Memorandum
9 to 5-Memorandum
Whiteboard-Memorandum
Cottage Garden-Picket Fence
Stroll-Happily Lost

Mixed Cardstock Stickers:

Happily Lost
Christmas Town
Head Over Heels

ABC Stickers:

This & That

Index Journaling Cards:

Memorandum

Chipboard Stickers:
Domestic Bliss

Other:
Maya Road white flower, stickpin & chipboard pendants, flower punch, circle punches, buttons, pearls
, machine stitching


Read more...

Looking Back & Looking Ahead

>> Thursday, August 11, 2011

August is such a transitional month for my family, as the school year begins and we head into a new routine. I always find that it's a bittersweet time-- I am sad to say goodbye to summer, yet at the same time by late August I am ready for a more structured routine!

I thought this month would be the perfect time to document my feelings about our summer (more specifically that special time I have with my kids), and also to get excited for what's ahead- fall!

In this layout, "Ode to Summer" I punched many different circles and layered them across the page with one of my favorite photos from the summer. I also used a hole-punch to punch small "confetti" to sprinkle across the page.

Lily Bee Supplies used:
Memorandum: Mixed Cardstock Stickers
This & That: Pretty Fabric, Brooch, Milk Bottle, Lin
ens, Post Card, Tea Cup, ABC Stickers
Hello Sunshine: Blueberry Pie, Chipboard Stickers.


For this "fall themed" layout I decided to pull out a few photos from Halloween last year that I have not had the chance to scrap. I used the fabulous Harvest Market Index Journaling Cards and paired it with some papers from the Christmas Town Collection, and Stationery papers in order to create a festive (yet non-traditional in the color scheme) Halloween layout.


Lily Bee Supplies Used:
Harvest Market: Index Journaling Cards, Mixed Cardstock Stickers
Stationery: Tomato, Mushroom, Butter
Christmas Town: Sleigh Ride
Catching Fall: 12x12 Rub-Ons


I hope you are having a wonderful August and you are finding time to look back and look ahead, and document your favorite memories.

Read more...

Beachin'

>> Thursday, June 16, 2011

Good Thursday morning everyone! Now that summer is upon us, that means lots of summertime fun with plenty of photo ops. I thoroughly enjoy spending summer days on the beach; who doesn't?! I love looking back at past years trips to the beach & getting inspired to pack our beach bag, cooler & road trip to the coast.

My layout share for today showcases one of my favorite photos I made last year. Spending a wonderful time chillin' on the beach while my two little's had an amazing time catching waves.


To create this layout, I layered two decorative border strips together, creating a slim band in the middle. I embellished the area with bits of chipboard shapes, rub-ons & a single flower. I didn't want to overwhelm the page with too many embellishments, but I also wanted some impact to the design.

I was originally going to use just the one large 5" x 7" photo on the page & add journaling strips, but it didn't seem complete enough to me. So, I printed out extra photos & used my circle cutter to finish my page. Added the tiny ABC stickers & the 12" journaling photo strip at the bottom, topping it off with a decorative border just for fun. I like how the circles through the page balances with splashes of blues tones throughout.

White creating this layout, I got the urge to plan several trips to the beach this summer. I even called up my parents letting them know of our plans for a visit & to beware of all the sand that will be invading their home this summer, once again.

Have a wonderful week, Cheers!

Lily Bee Supplies:
This & That Pretty Fabric
This & That ABC Stickers
Picket Fence Mixed Cardstock Stickers
Picket Fence ABC Stickers
Christmas Town Chipboard Stickers
Three Little Birds Laugh 12x12 Rub-Ons


Other Supplies:
Petaloo Floral Embellishment


Read more...

Happy St. Patty's Day...

>> Thursday, March 17, 2011

Happy St. Patty's Day! I just love all the fun green, clovers, leprechauns and fun of today! Today is one of my favorite "no pressure" holidays! It doesn't hurt that green is one of my favorite colors.

I made these cute little cards to celebrate!


I used a mixture of the Lovely Collection and Christmas Town. I know it's been said over and over, but all the collection really do work well together, don't you think? That's why I love Lily Bee so much!


I also used the backing of the big sheets of rub-ons for my card base and the "Lucky to know you" tag. Again, I love love love Lily Bee!! Even the packaging is perfect!


Lily Bee Supplies Used:
Lovely Collection Patterned Paper - Whimsy
Lovely Collection Chipboard Stickers
Christmas Town Patterned Paper - Sleigh Ride
Christmas Town Patterned Paper - Christmas Window
Christmas Town Chipboard Stickers


Read more...

Focus On: Christmas Town

>> Monday, February 28, 2011

Hello everyone! Hope you had a good weekend. Today, we taking a closer look at Christmas Town. Yes, it's only February (for one more day, yikes!) but this line is good for so much more than the holidays. Yes, it has some Christmas specific details, but mostly it's beautiful deep red, sharp black, lovely blue and green.

Piradee Talvanna created a super cute layout about her pup. The mostly black and red layout puts the focus on the fluffy dog. And the few touches of yellow gives the line an entirely different look.


Lily Bee Supplies Used:
Christmas Town Pattern Paper - Christmas Window and City Side Walk


Julia Stainton scrapped some photos of her darling youngest just chillin' while on vacation. I'm loving those florets topped off with the chipboard buttons.


Lily Bee Supplies Used:
Christmas Town Pattern Paper – Sleigh Ride, Night Divine, Town Tree


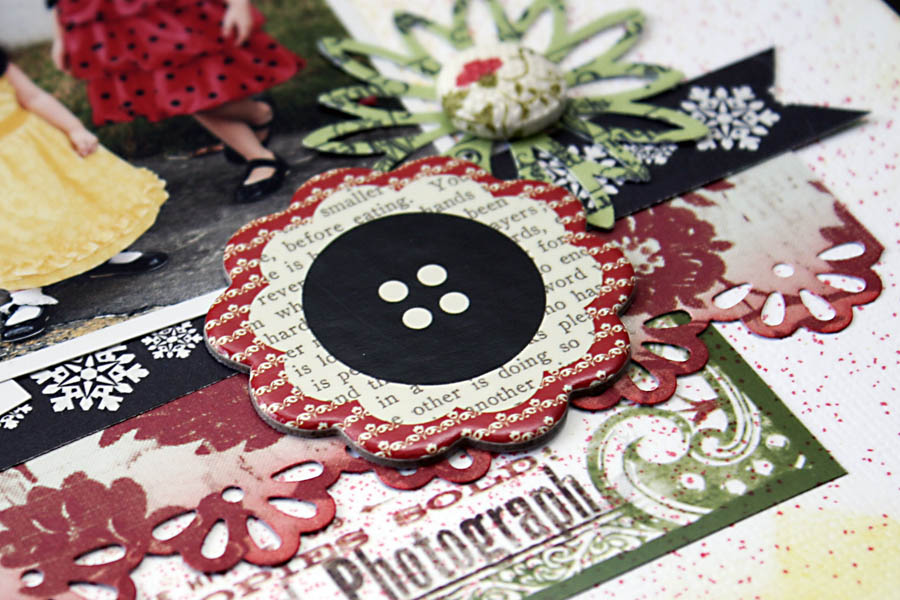
Iris Babao Uy's layout features Spring-y photos of her cute daughters in adorable frocks. I really like the frame with the photos slightly offset. So many pretty details to look at!


Lily Bee Supplies Used:
Christmas Town Pattern Paper - Christmas Window and City Side Walk


Hope you are inspired to use Christmas Town in a non-holiday way! If you do, please share with us by linking us here on the blog, or on our Facebook page.

And don't forget about our first challenge! There's still time to participate. And we hope you do!

Have a great Monday!

Read more...

Celebrating Valentines Day...

>> Tuesday, February 15, 2011

Hey there! This is Lisa today. Don't you just love Valentines time? I do. Especially this year, because 10 years ago on Valentines Day I got engaged. Wow, how time flies! It's so crazy how young I look in this picture.

I created this layout by patching together pieces from mostly the Domestic Bliss line, but also pieces from Christmas Town and Lovely to create the patchwork heart to celebrate the weaving together of our lives. The papers all mix together so beautiful. I also took parts of the stickers to make them work for this layout. I love how it turned out! The little messages here and there make me smile!


Domestic Bliss patterned paper - Kitchen Confidential
Domestic Bliss patterned paper - Pearls & Heels
Domestic Bliss patterned paper - Centerpiece
Christmas Town patterned paper - Christmas Window
Lovely Collection patterned paper - Parasol
Domestic Bliss Chipboard Stickers
Domestic Bliss Cardstock Stickers

Read more...

Mad for Books

>> Monday, January 3, 2011


Hi Lily Bee fans, Lori here with you today, with the first post of 2011. We had family pictures taken last summer and our photographer, Michelle Riddle, suggested we bring my oldest son's favorite book. We're good friends and I had mentioned that he is in love with reading and that I have a hard time getting his nose out of books. This is a good problem, to be sure. I love that she asked us to bring his favorite book, Harry Potter, because I simply adore these photos of him. I'm excited to put this layout in his school album.


Lily Bee Supplies Used:
Domestic Bliss Patterned Paper - Mrs. Perfect, Centerpiece and Pearls & Heals
Domestic Bliss Chipboard Stickers
Domestic Bliss Cardstock Stickers
Catching Fall Patterned Paper - Fall Festival
Christmas Town Patterned Paper - Sleigh Ride

Directions:
1. Cut 1/4" off two sides of a sheet of white cardstock.
2. Adhere it centered to the Fall Festival patterned paper and sew once around the edge with black thread.
3. Cut a 1/2" x 12" strip of the Fall Festival and Sleigh Ride patterned papers.
4. Punch two large flower shapes from the Mrs. Perfect and Pearls & Heals patterned papers and four large flower shapes from the Centerpiece patterned paper.
5. Tear the ends off the two strips at uneven lengths and adhere them, one on top of the other, about 3" from the bottom of the cardstock.
6. Layer and adhere the punched flower shapes centered and over the paper strips.
7. Using black thread, sew a line across the paper strips and flower shapes.
8. Layer five small flower shaped chipboard buttons over the center of the punched flower paper shapes.

9. Cut a large flower shaped chipboard button in half and adhere one piece to the upper left side of the cardstock and one piece to the top of the cardstock on the right side.
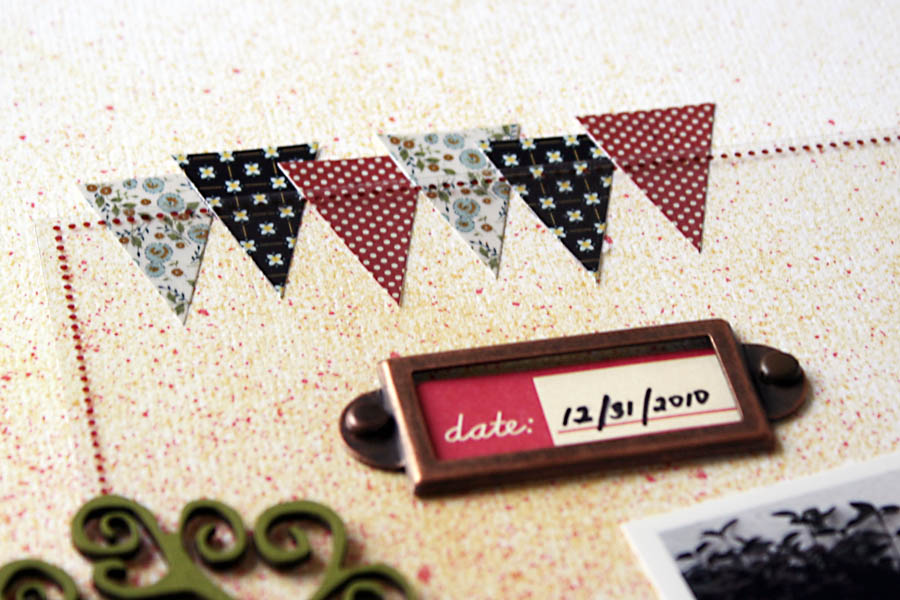
10. To the left of the chipboard piece at the top of the page, adhere four banner stickers and glue a piece of black thread over them.
11. Add photos, a title and journaling.

I decided on this layout it would be fun to mix black and white with color photos and journal around them. I, also, like to leave a white border around my photos and then trace around the border with a black sharpie. It makes the photos stand out a bit more. And since I can't draw straight for anything, makes it a bit more messy and me.

Thanks for stopping by the blog today.

Read more...