Showing posts with label Holiday. Show all posts

Day 24 - A Holiday Wreath (plus a Sketch Winner!)

>> Saturday, December 24, 2011

Hey there! Can you believe it is Christmas Eve? Insane, right? I'm suffering from a mix of elation, giddiness, and apprehension. The last because I haven't wrapped anything yet. I'm dreading the hours I'll be spending tonight. But it's all worth it in the end, right? I love this time spent with family, enjoying each other's company.

So here we are on the last day of Holiday Countdown. And today, I made a super easy wreath that can easily be adapted to other seasons and occasions.


It's basically a yarn-wrapped wreath with a patterned paper detail. Easy peasy. Wrapping the yarn around the foam wreath took me the longest. But I was watching a movie while doing it, so it was all good!

So here is what you will need:
  • Foam wreath (you can get it at any craft store in varying sizes, this one is 10")
  • Yarn in the colors of your choice (get the cheapest acrylic variety, not only is it super affordable, but you won't have to worry about moths eating it)
  • Little pompoms
  • Lily Bee Tiny Tablets
  • Glue (I used quick dry wet glue)
  • Scissors
  • and coffee if you are working on it early in the morning (like I did) or late at night (maybe a cup of decaf then?)
The yarn wrapping part is super duper easy. I start with a little wet glue (quick dry is best), and stick a portion of the yarn to the foam wreath. Once it's dry, I just start wrapping it round and round and round, changing colors as needed. Once I reach the end, I apply more glue, hold the end bit of the yarn a bit, and it's done. This would be a super project to do with kids!

Then it starts the even more fun part! Choosing what you'll create with paper to decorate the wreath. I choose a little paper bird. I found this pattern online. It took only one sheet of our Tiny Tablet. One. I'm thinking I'll make a bunch of them and make an Easter wreath too!

Once the bird was done, I cut (freehand) two little holy leaves (out of another sheet of our Tiny Tablet), glued them to the bird's neck, and added three teeny pompoms.
To attach the bird to the wreath, I used white thread and put a stitch on top of the bird, and sewed the other end to the yarn.

Wrap a piece of ribbon around the whole wreath to hang, and wham, you are done!

Other ideas for decorating the wreath (in case you are not into birds), flowers, leaves, hearts, stars. The possibilities are endless!

_________________________________________________________

In our excitement to post our Holiday Countdown, we totally forgot to pick a winner for our last Sketch Challenge. Oops! Sorry! But we have one now.
ERICA HETTWER
Congratulations, Erica! Please email me your mailing info milesofpaper [at] gmail [dot] com.
_________________________________________________________

We'll be taking a little break to hang out with our families. But do come back on December 28 when we'll get a peek inside designer Georgia Keays' studio. We have exciting things coming up in January. New challenges, guest designers, and we'll debut our new paper lines!


THANK YOU for a great year! We here at Lily Bee want to wish you a fantastic holiday season, and a healthy new year filled with love and scrapbooking!

Read more...

Day 22 - Joy Holiday Gift Bag

>> Thursday, December 22, 2011


Are you counting down to the big day yet? Just three more sleeps till Christmas!

If you're not done your holiday wrapping yet, that's OK. There's still time and there's still time to create a quick holiday gift bag to wrap things up in as well.


I love wrapping with custom gift bags. First of all, gift bags are so easy to wrap with and they are very quick and easy to make. You can keep them super simple by just adhering some pretty patterned paper on the front of a kraft gift bag or you can add a little more pizazz by creating a fun holiday scene.


To create a scene, I always love to start with easy shapes. A house can be built with a square and a triangle but for this design, I've cut out some wavy snow banks and some triangle shapes evergreens. A star punch makes for a super quick tree topper. And I seriously love how all the tiny dots on the Jingle line papers looks like a pretty snowfall.


When you're working with numerous papers to create a scene, I like to adhere them to some coordinating scrap paper. By building the scene on the paper, you can get everything just right and then adhere the final piece to the front of the gift bag. This also lets you add some stitching details if you wish to.


The Lily Bee ABC Stickers are perfect for adding in a little holiday cheer sentiment.


Finally, top off your bag with some ribbon and embellishments you have on hand.

Lily Bee supplies:
Patterned Papers: Jingle - Merry and Bright, Tinsel, Frost
ABC Stickers: Jingle


Thanks for joining me for this holiday project and may the gifts you receive this year be joy, love and peace.

Read more...

Day 12: Holiday Place Cards

>> Monday, December 12, 2011

Hey there! Hope you having a great time with our Holiday Countdown. Looking at these gorgeous projects has gotten me in a very holiday-y mood. And I'm usually grinchy until right before Christmas. :)

When I host a more, formal sit down dinner (I'm using formal very loosely here. I haven't been formal since high school prom, and that was eons ago!) I like to have place cards. You know the rule about not having couples sitting together, and doing a mixed boy-girl-boy-girl placement? I like that. Sorry, Couples Who Like To Sit Together! But it's just a better party if we mix it up a bit, and everyone is talking to everyone. That's when those place cards come in handy. Well, there are those people who sneak in the dining room and switch seating cards. You know who you are!

I usually just do a white card folded in half, but since it's holiday time, I decided to make a mini wreath with rolled paper. You've seen them everywhere, usually slightly bigger on a wall. The little version is really fast to make and it doesn't take a lot of paper.


What you'll need:
  • Lily Bee 6x6 mini paper pad (I used a combo of the Jingle, Memorandum, and This & That pads)
  • quick-drying wet glue
  • pop up dots
  • two-inch circle punch (mine is scalloped)
  • 1.5-inch circle punch
  • tree punch (or other shape)
  • stamping ink
  • pen
  • glitter
  • paper cutter
  • scissors

How to:
  1. Cut 4 sheets of the mini pad into quarters (the squares will be 3"x3").
  2. Roll each piece into a cone and glue the edge to hold its shape.
  3. Cut a 4" circle (it doesn't have to be perfect) to use as a base. Cover it with glue and start to stick the cones to it.
  4. Punch one 2" circle and one 1.5" circle. Glitter the edges. Punch a tree shape, add an initial or name, ink edges, layer with pop up dots. Stick it to the center of the wreath.
  5. Add glue to the edge of each cone and sprinkle lots of glitter.
  6. You are done!

By the way, I never ever use glitter on my projects. But this was way fun! Never mind my entire work area is covered, and my kids went to school today covered in shiny sparkley bits. I'm calling it holiday spirit.

Thanks for stopping by today! See you tomorrow for another holiday project!

Read more...

Day 11: Holiday Gift Tags

>> Sunday, December 11, 2011

Hi Lily Bee friends!  It's Jenni here today with a few quick ideas for making gift tags for your holiday gifts this season.

If you are anything like me, you may be in the middle of many different holiday craft projects and have scraps galore.   Well, how about using some of those extra small pieces of paper and making gift tags?   I found that using the Jingle 6x6 Tiny Tablet was perfect for this project!


I used Kraft tags by Ranger, but you can find tags like this at your local office supply store.  It's great to have a stack of these around for such things and they also are wonderful for scrapbook layouts!   I then used various scraps from my Jingle 6x6 paper pad, Jingle cardstock stickers, ABC letters, and journaling cards and went to town.  

I added a few extra items such as stickpins, border punches, ribbon, and twine.   I really enjoyed using the Jingle stamp collection as well.  I paired it with silver ink from American Crafts to create the snowflakes in the tag below. 
This last tag was the quickest to make, but it might be my favorite! I took three different square punches to create a stack of presents-- so fun!   It would be easy to repeat these designs with different Jingle pattern papers to create a handmade, uniform look underneath your tree.


I hope you are enjoying our 24 days of holiday inspiration!  And as you craft, don't forget to save your Lily Bee scraps to make beautiful gift tags!

Lily Bee Supplies Used:
Jingle: 6x6 Tiny Tablet, ABC Stickers, Cardstock Stickers, Journaling Index Cards, Clear Stamps

Read more...

Day 7 - Vintage Christmas Banner

>> Wednesday, December 7, 2011


It's beginning to look a lot like Christmas! Have you been following all the wonderful festive projects each day here on the Lily Bee Blog? It's Julia here, with another fun and holiday project to inspire you.


I love creating banners to decorate my home and the beautiful soft and subtly distressed papers of the Jingle line inspired this vintage style holiday banner. I've strung it across a black painted dresser that I use as a sideboard for a festive look this holiday season.


I started out by creating each triangle pennant from some chipboard. Each triangle measures 4.5" across by 6" deep which is a great size for flexibility. I've used the 12x12 papers but this project will also work using the smaller scaled Tiny Tablets.

After covering each chipboard piece with patterned paper, I stitched around the edges for a little extra detail. Around the bottom edges I've adhered some ruffled lace to add to the vintage look.


To create some fun embellishments for each pennant, I've combined Jingle Index Cards and created sweet little rosettes using patterned paper and the Jingle stickers. If you're looking for greater detail, most of these photos can be clicked on to enlarge them.


After each pennant is created, punch a hole on the top corners of each triangle with a hole punch.


String each pennant together using some ribbon or hem tape.


Decorate your home with your finished banner and enjoy!

Thanks for joining me today and I hope you find joy preparing for the holiday season,


Lily Bee supplies:
Patterned Papers: Jingle - Mistletoe, Garland, Tinsel, Frost
Index Journaling Cards: Jingle
Cardstock Stickers: Jingle
ABC Stickers: Jingle

Read more...

Day 6 - Holiday Gift Bows

>> Tuesday, December 6, 2011

For the winner of last Friday's giveaway, please go here.

Hey there Lily Bee fans, Cindy here. Today, I want to share my gift bows project with you. I love to dress up a gift box for any occasion & this year, I plan on dressing up a few of the kids Christmas gifts with handmade gift bows using the wonderful Jingle Collection.

To create your gift bow(s), simply trim nine strips of pattern paper that measure 1/2" or 3/4"; three 10", three 9", two 8" & one 5".

For each strip (except 5" strip), create a loop from each end, stapling together in the center.

Layer & adhere each looped striped using glue gun from bottom up, largest to smallest.

Fold & staple 5" strip, adhere using hot glue to center of bow.

Adorn center of bows with dimensional embellishments such as Lily Bee's Christmas Town Chipboard Stickers.

The strips of these bows are 1/2" wide & each one was adorned with Jingle Mixed Cardstock Stickers & twine.

Thanks for letting me share my creation with you today & hope you are having fun creating this holiday season!

Lily Bee Supplies:
Pattern Paper: Jingle-Mistletoe, Merry & Bright, Peppermint, Tinsel, Garland, Egg Nog, Frost & Cranberry
Mixed Cardstock Stickers: Jingle
Chipboard Stickers: Christmas Town


Read more...

Focus On: Thankfulness

>> Monday, November 21, 2011

For the winner of the Lily Bee + Maya Road blog hop, please go here.

Happy Monday, everyone! Hope you had a great weekend. This Thursday is Thanksgiving here in the US. It's my favorite holiday of the year. It's one of those holidays that is celebrated by almost everyone, regardless of religion, because everyone can find something to be thankful about. So we asked our designers to create projects that are thankfulness related. (Click on photos to see a bigger version.)


So Thankful by Jenni Hufford
Lily Bee supplies:
Harvest Market- Peach Crisp, Black Licorice, Turtle Neck, Pumpkin Seeds, Squash
Memorandum- Boardroom, Whiteboard 
Lovely- Parasol, Chipboard Stickers
French Couture- Handmade, Tailored
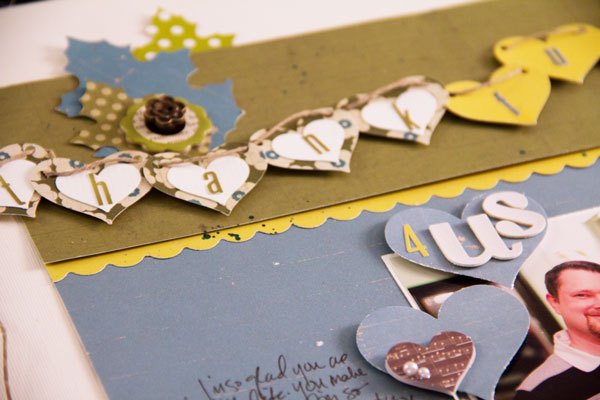
 Thankful 4 Us 2 by Cindy Liebel
Lily Bee supplies:
Patterned Paper:
Harvest Market Black Licorice
Harvest Market Squash
Jingle Spruce
Stickers:
Harvest Market ABC Stickers
Head Over Heels Mixed Cardstock Stickers
Christmas Town Chipboard Stickers
Other: KI Flower Buttons, Jillibean Soup heart stickpin, Silhouette die-cut machine & Fiskars punches
Thankful tag by Lisa Day
Lily Bee supplies:
Tiny Tablet: Harvest Market
Mixed Cardstock Stickers: Harvest Market
ABC Stickers: Harvest Market
I Am Lucky! by Linda Barber

Lily Bee supplies:
Tiny Tablet: Memorandum
ABC Stickers: Memorandum
Stamps: Picket Fence
Other: thread

What are you thankful for this holiday? Please share with us!

Thank you for taking some time to drop by! Hope to see you again tomorrow.

Read more...

Happy St. Patty's Day...

>> Thursday, March 17, 2011

Happy St. Patty's Day! I just love all the fun green, clovers, leprechauns and fun of today! Today is one of my favorite "no pressure" holidays! It doesn't hurt that green is one of my favorite colors.

I made these cute little cards to celebrate!


I used a mixture of the Lovely Collection and Christmas Town. I know it's been said over and over, but all the collection really do work well together, don't you think? That's why I love Lily Bee so much!


I also used the backing of the big sheets of rub-ons for my card base and the "Lucky to know you" tag. Again, I love love love Lily Bee!! Even the packaging is perfect!


Lily Bee Supplies Used:
Lovely Collection Patterned Paper - Whimsy
Lovely Collection Chipboard Stickers
Christmas Town Patterned Paper - Sleigh Ride
Christmas Town Patterned Paper - Christmas Window
Christmas Town Chipboard Stickers


Read more...

Celebrating Valentines Day...

>> Tuesday, February 15, 2011

Hey there! This is Lisa today. Don't you just love Valentines time? I do. Especially this year, because 10 years ago on Valentines Day I got engaged. Wow, how time flies! It's so crazy how young I look in this picture.

I created this layout by patching together pieces from mostly the Domestic Bliss line, but also pieces from Christmas Town and Lovely to create the patchwork heart to celebrate the weaving together of our lives. The papers all mix together so beautiful. I also took parts of the stickers to make them work for this layout. I love how it turned out! The little messages here and there make me smile!


Domestic Bliss patterned paper - Kitchen Confidential
Domestic Bliss patterned paper - Pearls & Heels
Domestic Bliss patterned paper - Centerpiece
Christmas Town patterned paper - Christmas Window
Lovely Collection patterned paper - Parasol
Domestic Bliss Chipboard Stickers
Domestic Bliss Cardstock Stickers

Read more...