Showing posts with label Happily Lost. Show all posts

Word Personality

>> Monday, May 7, 2012

Happy Monday!

I hope you had a lovely National Scrapbook Day weekend and was able to create among your scrapbooking friends, near and far. I didn't really get the chance to do much creating, but I did brainstorm and sketch ideas I want to try. One of those ideas is to play with words using negative space throughout the background.


I used my daughters name to spell out her personalities. This is always a fun way to use up lots of space on a page and a fun way to create your title. When I've done this before, it was always with stickers. This time around, the trend is using a die-cut machine.


For this layout, I used my Cameo Silhouette to cut out the words. I used my daughters favorite colors, pink & green, to highlight each word and used a more subtle complimentary shade of color to highlight her full name separately. This required a variety of pattern papers used from five fabulous collections, which is always fun to mix old with new.


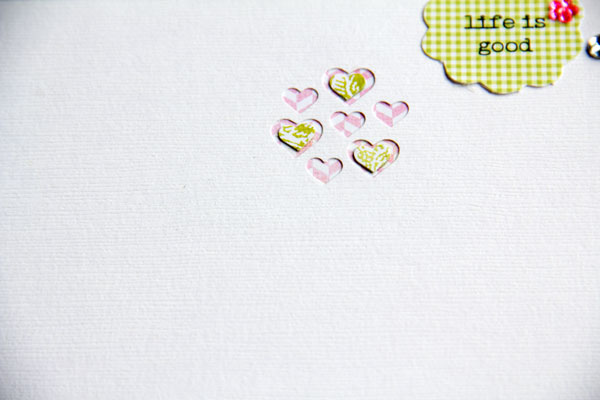
I also used a small punch to create a small accent area and embellished around it and backed it with more pattern paper and pearls.


While the words were cutting, I made time to select the papers & embellishments I wanted to use to complete the project. This allowed me to complete my layout faster and I'm very pleased with the end results. I also plan on using the leftover letters for either my project life or future scrapbook project. Can't let all those letters go to waste.

Have a great week & happy creating!


Lily Bee Supplies:
Pattern Paper:
Happily Lost-Hammock, Picket Fence-Cottage Garden, Handmade-Thimble, Handmade-Pink Lemonade, Victoria Park-Grand Theatre, Victoria Park-Wortley Village, Buttercup-Queen Bee & Statinery-Pear
Stickers:
Buttercup Mixed Cardstock Stickers
Bag of Bits:
Victoria Park & Handmade
Chipboard Stickers:
Christmas Town

Read more...

Finally Friday.

>> Friday, January 13, 2012

The weekend is just about here and if your week has been anything like mine, you're ready for some relaxation...and some scrapping, too!  So here's an easy layout you can put together in less than 30 minutes - perfect for a Friday night scrap session!

He Shoots, He Scores • layout by Lisa Dickinson
Lily Bee Supplies:
Happily Lost Patterned Paper - Sun Soaked
Stationery Patterned Paper - Pear
Head Over Heels Patterned Paper - Crush, Dreamy
Happily Lost ABC Stickers

First I printed a strip of photos about 2.5 inches high to span across my page.  Then I went to work cutting various sized circles from the patterned papers.  Mine range from 4.5" down to .75" but feel free to make them whatever size you want.  I layered two of my circles with die cut images cut from black cardstock:


When I'm printing my journaling directly on my background cardstock, I like to lay out the page elements on the cardstock first (without adhering anything) and roughly determine where my journaling will go and how much space I have to work with.  Then I set up a text box to fit that size and print my journaling out.

After arranging and adhering my photo strip and circles, I added a ttiny itle from ABC Stickers and embellished the page with a few sparkly pearls and rhinestones.

So celebrate the fact that it's finally Friday and do a little scrapping - we'd love to see what you create!


Read more...

2012 Mini Album Tutorial

>> Wednesday, January 4, 2012


Happy New Year everyone.  It's Ronda today with a step by step detailing this adorable mini album for the new year.  This quick & easy mini could be used for multiple projects such as a goal journal, a One Little Word album, a monthly glance at your year, etc.  So many possibilities in one sweet little album. 

Supplies:
a variety of Lily Bee patterned papers
Lily Bee Alphabets
Lily Bee Happily Lost Stamps
two 4 x 6 Chipboard pieces
scoring tool
Paint
Binder Rings
Border Punch
hole punch
Sewing Machine


First you need to cut two pieces of 4 x 6 inch chipboard pieces to create your cover.  You can usually purchase these pieces fairly cheaply from your local scrapbook stores.  I usually have a stack on hand so i can create my own covers.


Choose your favorite Lily Bee Patterned paper for the cover.  Here i am using This & That Milk Bottle.  I just love that blue!  Adhere to the front of the chipboard, gluing in the center of the paper.  Why you ask?  Well i knew i wanted to stitch around the edges of the chipboard so i didn't want my needle hitting the adhesive & getting sticky. 


I added a thin paint layer around the edges of the album to give it some texture.  I love that it is quick & a bit rough.  Next i stitched around the edges of the cover.  Yes you can stitch through chipboard.  Just go nice & slow, using a long stitch making sure your tension isn't too tight.


Next i added a chipboard accent piece.  I painted the top of the butterfly using the same paint i used around the album cover.  Next i added a bit of clear glue & some German glass glitter.  You could also use regular glitter as well. 


Once i added the butterfly to the album i decided the solid orange background wasn't popping enough for me so i changed it up with strips of leftover patterned papers.  I added two green stick pins for the antennae which added that pop of color i needed.

I grabbed my Happily Lost Banner Stamp and stamped it on a piece of neutral patterned paper.  I went with the same color palette as the paint.  This way my title could really stand out.


This album is titled Reflections.  In order to get the position right on the banner, i first wrote out my word and found the center letter.  I work out from there to fill in the rest of the letters.  Sometimes i add the first letter so i know how much room i have.  You also have to remember you may have to adjust your "center" letter depending on the font size of the letters.


Next choose a variety of coordinating Lily Bee Papers.  I have a fun bright palette of colors choosing warm greens, yellows, pinks, oranges, blues, and a hint of black.  They make me happy!  You will need twelve 4 x 12 sheets of patterned paper plus one 4 x 6 piece.  These are going to be the base of your interior pages.


These 4 x 12 pages become pocket pages similar to the So Blessed Lily bee album i did in 2010.  Score your twelve 4 x 12 pages at 2 inches and at 6 inches.  Fold the page in half at the 6 inch score mark.  Fold the 2 inch score mark down & punch the edge with your favorite border punch. 


You can adhere the two sides down and create the pocket.  I like to stitch mine down by stitching all around the edges of the page.  Now you have 12 pockets for your mini album, one for each month if you so choose.   

I have created these journal inserts for my pocket pages.  You can download the pdf of the interior pocket journal cards from my blog.  I am planning on using this to capture my month's at a glance.  I will place a photo on one side of the page & the pocket page on the other side. 

Because of the way i am doing my photos, i needed a cover page.  Here i have two options for the interior cover for you.  One uses the the journal card on the cover page to create consistency.  The other makes use of the scraps of patterned paper.  I gave you this option because you would need to print out an extra journal card to use it on the cover. 


Here's the start of my interior pages. I plan on placing a collage of photos on the backside of the green paper, opposite of the January pocket that is a snapshot of my month.  Like i said above, you can use this album for multiple projects.  

Have a blessed New Year

Read more...

A Little Upcycling

>> Tuesday, October 11, 2011

Hey everyone, Cindy here with a simple layout showcasing the use of negative space from a sheet of chipboard. Since I print from home, I tend to have an excessive amount of random photos laying around. To keep my pile from growing, I give most of the extras to my daughter for her own scrapbook projects. But there are always a few I love so much I couldn't resist using them again on a layout.


I wanted to create a frame within a frame on this layout. Used my sewing machine to create a stitched border on the polka dot background and framed a variety of photos behind the open spaces of the chipboard.

Then the fun part, embellishing each open space with layered elements using punches, brads, buttons & jewels. Adding the embellished journaling card and flower accent gave the page that extra burst of texture, dimension and balance I was looking for. I love how the black & white photos mixed with color photos flows with the color palette.
So, instead of throwing away your leftover packaging items that normally aren't meant to be used on a layout or project, step out of your comfort zone. Keep them & use them. CHEERS!


Lily Bee supplies:

Patterned Paper:
Lemon-Memorandum
9 to 5-Memorandum
Whiteboard-Memorandum
Cottage Garden-Picket Fence
Stroll-Happily Lost

Mixed Cardstock Stickers:

Happily Lost
Christmas Town
Head Over Heels

ABC Stickers:

This & That

Index Journaling Cards:

Memorandum

Chipboard Stickers:
Domestic Bliss

Other:
Maya Road white flower, stickpin & chipboard pendants, flower punch, circle punches, buttons, pearls
, machine stitching


Read more...

Memories of Summer

>> Friday, September 30, 2011

Hi everyone, I'm sharing a couple of Layouts today. The first one was created from a mix of products from the Lily Bee Winter release. I have used a lot of scraps to create the flowers and add little details to the page. I wanted to capture the spirit of Summer with all the flowers.


Lily Bee Supplies:
Happily Lost - Sun Soaked paper
Happily Lost - Amazing Views paper
Picket Fence - Fresh Air paper
Picket Fence - Cottage Garden paper
Picket Fence - Verandah paper
This & That - Brooch paper
Stationery - Cotton Candy


On the next Layout I've used a mix of 'Memorandum' and 'Head over Heels' from the CHA Summer release. It is a random page to capture the funny thing my daughter said the other night while watching the talent show X-Factor Australia. Here is the journaling...

Me: "Oh, she is doing a Cindy Lauper song"

Romy: "Mum, you must be really old to know this song."


Lily Bee Supplies:
Memorandum - Whiteboard paper
Memorandum - Index Journaling cards
Head over Heels - Swoon paper
Head over Heels - Courting paper
Head over Heels - Mixed Cardstock Stickers
Head over Heels - ABC Stickers
Head over Heels - 6x6 Tablet
Happily Lost - Mixed Cardstock Stickers

Well, I suppose I must be getting old if I remember Cindy Lauper :)

Have a great weekend!

Read more...

Sharing the Love

>> Wednesday, September 21, 2011

I adore paper crafting. I'm pretty sure you do too. There's that creative satisfaction of making something.

I love creating layouts. I love creating things for my home.

But I really love being able to share my paper crafted projects with others. Sharing the love, you know?

Today I have a couple quick projects that you can share with others. I hope they inspire you to create something to give away. You get double the pleasure. Once when you make it and then again when you give it away.


Recently I've been playing around with dies and exploring their possibilities. One that has really caught my attention is a pillow box die. It's so quick to create sweet little pillow boxes. They resemble petals from the edge which led to putting seven little pillow boxes together to form a floral package of little boxes. Perfect for housing a fun little gift in each one. Once I put each pillow box together, they can be held together with glue dots along their adjoining edges.

The Lily Bee Tiny Tablets are perfect for using with your die cutting machine. These 6x6 papers are a lovely tiny 1/4 scale and coordinate perfectly with your larger 12x12 papers. The great thing about using the Tiny Tablets for die cutting is that you don't have to cut down your full-size sheets. I just pull them out of the pad and put them straight into the die cut machine. I love saving time. I've used the Happily Lost Tiny Tablet with this project.

The little gift tag is tied on with some tulle. The Lily Bee stamps are great for adding accents to embellishments and the Alpha Stickers are wonderful for adding a sentiment.


Lily Bee Supplies:

Happily Lost: Tiny Tablet, ABC Stickers
Picket Fence: Stamp Set


I've also been having fun creating with the upcoming Head Over Heels line. This card uses some pretty papers (Dreamy) from this line which is a mid-season release and will be shipping next month. Stay tuned!

Spread the love...

Julia

Read more...

Color Stories

>> Wednesday, September 7, 2011

Have you ever associated colors with genders?  Is pink definitely girl?  Is blue always boy?  Hopefully after this post you can see how colors are gender neutral.  It's how you use them that makes them feminine or masculine.  With just a few accessories or shapes you can change the look of your project to suit your story. 

In both my projects i used the same color palette & patterned papers: Happily Lost Villa, This & That Brooch, and This & That Teacup.  Basically Orange, yellow, black, grey, & blue.  Sounds pretty masculine too me.


I did start with a masculine page.  I picked some colors that i thought would go with the feel of his photos.  I wasn't basing the colors on gender but what went with these photos.  In fact if you look at the names of the paper, they seem to say feminine: teapot, brooch.   I sprayed the background with blue mists in a grid pattern.  The grungy grid reminds me of him.  I decide to die-cut some stars out of the yellow & black paper.  With a bit of black pen around the edges, they stood out on the background.  A paper edge punch reminds me of school & notebooks so it was a good fit for this layout.  Keeping it simple also seem the way to go to keep it in that boy feel i was looking to achieve.  So love this layout, it is perfect for him!


For this cute little card i took the same patterned papers & used them in a way that suggest female.  The message on the This & That mixed cardstock sticker is definitely feminine in nature so it adds to the feel.  I sprayed the background with grey mists using a flower lace template.  I used a curved punch along the side of the paper & layered the Domestic Bliss Chipboard Sticker Flowers to the side.  Again a little bit of black pen along the edges to give them definition and the card is complete.

So if you find a color palette that is perfect for you project but think it might be too gender specific, think again.  Think about how you can change perceptions and make the colors work for you story.

Read more...

Recycling Inspiration

>> Wednesday, August 31, 2011

Some days, I find myself with a little spare time and my first thought? Scrapping! OK. That's a lie. My first thought is NAP! Hahahah! But alas, with three kids, napping during the day is not usually an option. So back to scrapping.

Sometimes I sit down to get started and suddenly draw a blank. I have photos, I have products, but design... uhm... Sometimes it just escapes me.

There are great inspiration blogs, with sketches, color challenges, product challenges. But lately, I have found that there's no need to invent the wheel again and again. I can just scraplift myself. Yup. Myself!

Case in point, this layout I created for Simple Scrapbooks magazine a few years ago. It's still of my favorites.

I took that simple, but graphically strong design and made another layout. And a card! The other thing I did was to challenge  myself to use up the scraps of paper I was creating with the punched circles. I used our Tiny Tablets, and only one big sheet of paper.


Lily Bee supplies:
patterned paper: Stationery-Mushroom
Tiny Tablets: Picket Fence, Happily Lost, This & That
ABC Stickers: Picket Fence, Happily Lost, This & That
Stamp: Happily Lost Acrylic Stamps

other: punches, stamps, pop up dots

So next time you are feeling stumped by scrapbooking, pull out your old favorites and do it all over again!

Read more...

still inspired...

>> Tuesday, August 30, 2011

Even with the delicious new ranges from CHA I am still finding so much inspiration from the older lines. Today I'd like to share two layouts, one using This & That and another with Happily Lost.

I absolutely adore this photo of my oldest and youngest together. Lucy dotes on Archie so much, it always warms my heart to see how much she loves him. Given how much I love the photo, I wanted to keep the layout simple to make sure it was the main focus. I've used one quite neutral paper as my background and then just added some splashes of colour by punching butterflies out of some of the brighter papers.


Even with a simple layout I wanted to include some dimension so I've added some bright baker's twine in big loops, letting them stand up from the page.


Products used:
This & That - Teacup
This & That - Linens
This & That - Brooch
This & That - Label Stickers
This & That - Mixed Cardstock Stickers
Stationery - Slushie

The second layout is one of myself with my dear friend Jenae who recently sold her scrapbooking store. This photo was taken at the farewell party. I've gone with pink and lime green as these were the colours of the store logo.


It is such a bold combination that the layout looked almost full before it was started and yet I wanted to include lots of detail. I decided to group my embellishments into tight clusters which allowed me to use a lot of little bits and pieces without the layout looking too cluttered.


Products used:
Stationery - Pear
Stationery - Slushie
Happily Lost - Hammock
Happily Lost - ABC Stickers
Happily Lost - Mixed Cardstock Stickers
This & That - Mixed Cardstock Stickers
Three Little Birds - Laugh Run-Ons

Don't forget to post your Lily Bee creations on our Facebook page - we always love to see how you've used our products - new AND old!


Read more...