Showing posts with label Buttercup. Show all posts

True Friendship

>> Friday, June 22, 2012

Sometimes, I get so caught up in scrapping about my family and what is going on in our lives that I don't think to record my friendships.  

In the layout I'm sharing today, I wanted to highlight a very special friendship I have with a woman I truly consider to be my sister.  No, we're not blood sisters, but we are certainly as close as sister's might expect to be.


I love that good friends walk together through life. And since I used a gridded paper for the background, I was able to easily write my about our 'walk' together directly on the background paper.


I'm a big fan of having tabs that stick up above the top edge of my page.  They look great, add a little unexpected dimension and still fit nicely inside my albums. Here, I used the Victoria Park Journal Cards to add the effect of tabs.


I love using the 6x6 pads to create my own embellishments.  For the flower below, I simply punched a couple of shapes out of the small-scale patterned papers and added a brad.


Overall, you'll see there are a lot of details added to the page but it still retains the feeling of having white space to allow the eye to rest.  Clustering makes it possible.

Lily Bee Supplies Used:
 Pattern Paper: Victoria Park, Handmade, Buttercup
ABC Stickers: Handmade
Journal Cards: Victoria Park, Handmade
Bag O Bits: Handmade
Mixed Cardstock Stickers: Handmade, Victoria Park
6x6 Paper Pads: Memorandum, Victoria Park
Stamps: Handmade

Other Supplies Used:
Punches: EK Success, Fiskars
Silhouette SD Die Cut Machine
Wood Veneer: Studio Calico
Scarlet Bird Designs Button Badge, Die Cuts
Brad: My Mind's Eye
Button Maker: Epiphanie Crafts
Mist's: Maya Road
Ink: Jenni Bowlin Studios


Have a beautiful Lily Bee Design kind of day and make something lovely!

Read more...

A Colorful Birthday Banner

>> Thursday, June 21, 2012

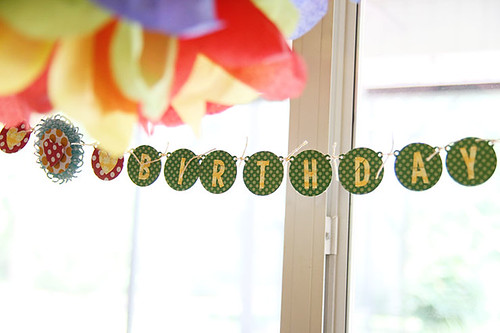
Hi, everyone, Patricia here to share a birthday banner with you.  With just pattern paper, twine, some adhesive, and a die cutting machine or punches, it really is easy to make your own banner.  What is really best about making your own banner, is you get to pick your colors.
My daughter's birthday party theme is rainbow, so I knew I wanted bright colors.  This banner was quick to put together because I kept it simple, using lots of repeating pattern papers.  
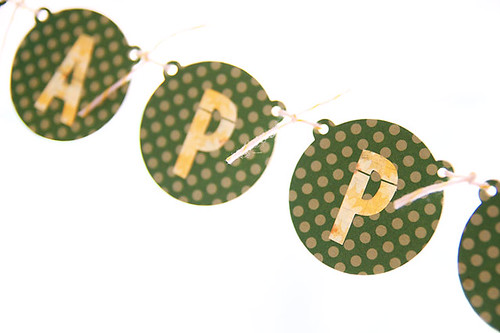
I used the Silhouette, and stayed with one color for the circles with the cut out letters.
Then backed those green circles with another circle using a simple contrasting pattern paper in yellow. 
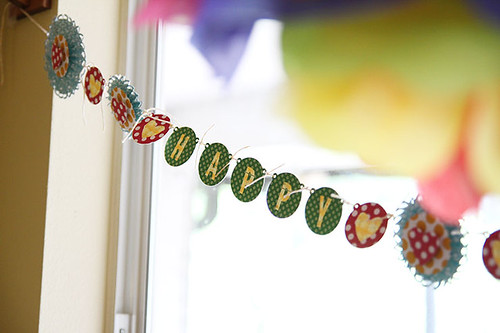
For the circles with the cut out hearts, I did the same thing, except instead of the green polka dot paper, I chose the pink polka dots, and repeated those throughout the banner.
I made the blue folded flowers using a border punch and a score board.  Then layered a scalloped orange polka dot circle right on top. The pink polka dot hearts were attached with foam adhesive.  I kept the banner light because it is so long.  And then the last thing to do...attaching each piece with a piece of twine.
Lily Bee Supplies:
Patterned Paper:  Lemonade - Double Dutch, Grass, Richmond Row - Victoria Park, Robin’s Egg - Buttercup, Pattern Block - Handmade


Read more...

Vacation Scrapping with Buttercup (and just a little Handmade)

>> Tuesday, June 19, 2012

Good morning, everyone!

It's a bright, happy summer day here, and even though a vacation isn't in the plans for me just yet, I'm having fun reliving past trips by scrapping some of my neglected travel photos.

DSC_6135.jpg

This layout documents part of a trip my husband and I took to Aruba early last year. I just loved bright,  colors of many of the buildings we passed by, so I took a cue from my photos and pulled together a beach-y color palette using Lily Bee's Buttercup collection, with just a bit of Handmade thrown in to add a little pink. The Mushroom Stationery (also from Buttercup) completes the look by giving the page a subtle worn look reminiscent of the peeling paint found on nearly any building that's near the ocean.

DSC_6128.jpg

DSC_6129.jpg

DSC_6130.jpg

What about you guys? Is anyone else itching to pull out vacation photos and scrap them?

Lily Bee Supplies:

Patterned Paper: Buttercup (Robin's Egg, Flower Pot, Queen Bee, Blossom, Mushroom Stationery), Handmade (Thimble)
ABC Cardstock Stickers: Buttercup
Mixed Cardstock Stickers: Buttercup

Read more...

The Best Dad

>> Tuesday, June 5, 2012

Hello Lily Bee fans!  Patricia here, and I am so excited to be here today to share my layout with you.  My daughter is every bit a "Daddy's Girl," and this picture from our recent beach trip just captured the love between these two, even though it is an iPhone photo.
I wanted to create a fun, playful, and carefree layout about this special relationship.  I used the blue and green pattern papers with accents of red and tan.  The little touch of girliness in the fuchsia bow is just enough to pull out the pink my daughter is wearing. 

I used the Silhouette to cut out these tags at the top, as well as the tiny circles to give them a finished look.  I framed the photo with a cluster of stickers and a heart from the bag of bits. 
 I also wanted to have a list of why my daughter loves her Dad.  So after trimming off a piece of twine, not sure exactly how I was going to attach these numbered flags I cut with the Silhouette, I liked the look of it flowing loosely across the page.  So I decided to add more banner stickers to the twine.  The "You Make Me Happy" sticker I cut it apart before attaching.   For some added interest and dimension, "Happy Happy Joy Joy" sticker was attached with foam adhesive; the butterfly, I backed with pattern paper, so I could fold and attach with glue on the crease.
 I masked and misted just one section at the bottom with hearts I cut with the Silhouette, then used foam adhesive to attach the cut out hearts to create a border and a little more softness.  For the list, I asked my daughter why she loves her Dad (she's 3 1/2 almost 4), and I wrote exactly what she told me.  She was so excited to give me this list.  She has now been asking me why I love her...so sweet.  I used the numbers from the Double Dutch stamps, they were perfect for making this list at the bottom.  For the journaling, I wrote on top of an index journaling card, then cut it into strips to adhere where I wanted them. 
I am so glad to have this special relationship documented with this page.  

Lily Bee Supplies:
Patterned Paper:  Running Stitch, Sky Blue, Fat Quarter, Rag Quilt, Stationery Linen - Handmade, Sand, Key Lime Pie, Celery, Marmalade - Double Dutch, Grass - Victoria Park, Rain - Buttercup
6x6 Tiny Tablets:  Buttercup
ABC Cardstock Stickers:  Handmade and Buttercup
Cardstock Stickers:  Handmade and Double Dutch
Index Journaling Card:  Buttercup and Double Dutch
Stamps:  Double Dutch

Read more...

Eat Well

>> Friday, May 25, 2012

As a woman with a family and a home, I don't very often get to eat at what I'd call a 'fine dining' establishment. Of course, it's not because I don't want to, but one can only afford so many $25+ plates in a given year before the bankers come calling.  At least that is the reality for our family.


Given that, when I do get the opportunity, I want it to be memorable.  That involves things like planning the right place and the right time and the right occasions. I can do that is to take extra care with my appearance and preparations.  But all of that will still allow the memory to fade.


Photos, however, will help keep it alive.  A well photographed location or plate of food can evoke so many things in people.  Why do you think they spend so much on marketing photos for all the major restaurant chains?  Because it evokes a certain 'something' when you see a mouth-wateringly juicy burger topped with the freshest, greenest lettuce and the ripest, reddest tomatoes and veritably dripping with secret sauce!!!


With all of that in mind, I decided to take out the big guns when my husband and I recently visited a local restaurant for our 20th anniversary.  I brought my big ole Canon DSLR to dinner with me and took time to shoot the food as soon as it arrived at our table.


I admit, I was a little embarrassed to do it, but the waitress even came by on one of my shooting occasions and gave me a thumbs up for being brave enough. 'Yeah!' I thought, 'I'm not so weird after all am I?!'  Well, maybe I am, but I did get some great shots and we'll not soon forget this occasion of Eating Well!


The rich, warm colors of my photos led me to the Buttercup Collection. That yellow damask pattern seemed the perfect compliment to our fine dining adventures and helped bring out the warm tones in my photos.


I also played with the round frame stamp from the Handmade collection to add a little extra color and texture.


I dug out my turquoise and grey washi tapes which blend so beautifully with the colors of Buttercup and created a bit of extra texture behind the bank of photos on the right side of the page.  The mini cardstock alphas make perfect photo captions.


And I couldn't resist creating another brad from the cardstock stickers and my Epiphany Crafts tool.


Give dining out photography a try and let us know how you like it!  I'd love to see what you come up with!


Lily Bee Supplies Used:

Patterned Paper: Buttercup (Queen Bee, Rain
ABC Cardstock Stickers: Buttercup
Mixed Cardstock Stickers: Buttercup
Journal Cards:Buttercup,  Double Dutch
Bag of Bits: Buttercup

Stamps: Handmade

Read more...

Banner borders...

>> Thursday, May 24, 2012

Hi there, this is Danielle Flanders here with an idea for those banner stickers!

I loved the patterns in the cute Buttercup banner stickers, so I wanted to add them to a card. Small shapes are a great way to add many different patterns, colors and interest, and the triangles make it so easy because they are already cut out for you! I was inspired by how they came on the sticker sheet and transferred them right to the card just how they were on the sticker sheet.

A Victoria Park floral stamp was stamped in aqua ink on the top and bottom to frame out the sentiment and add some softness.
 Here is one more where I used the banner stickers horizontally to create a border.

I used the Buttercup stickers on these two cards also. A frame is cut in half and added it to the top and bottom of the "today is a good day" sticker.
This is a super quick and easy embellishment idea for a card/ layout. Thank you for visiting the blog today. Have a creative day!

Danielle

LilyBee Supplies:
Buttercup 12x12 paper - Flower Pot BCP 210
Buttercup Mixed Card Stickers BCS 215
Victoria Park Clear Stamps VCP 235
Other: ribbon, sentiments, ink: Papertrey Ink, twine: Pink Paislee.

Read more...

You Sweet Girl!

>> Tuesday, May 22, 2012

Hey everyone! It's Melissa here today to share a layout with you. I really love the new "Buttercup" collection. Yellows, blues, & grays are prominent in this collection and those colors just make me happy!


To create the foundation of my layout, I took a piece of white card stock and then started layering sheets of paper from the 6"x6" pad in the "Buttercup" collection. I used white gesso to help adhere the papers down and when I had all the paper where I wanted them, I swiped some more gesso over the top of all of the papers to give it a slight white washed effect. It helped tone down all of the patterns and colors I had used just a bit. In between some of the layers, I tucked in some index cards. I used my tiny attacher to help hold everything down.


At the top of the layout, I stapled down some twine and then used the pennant stickers from the "Buttercup" collection to create a banner across the length of the layout.

I placed my photo in the upper right quadrant of my layout. Directly underneath my photo, I first stamped some chevron lines in brown ink and then placed my title across the top. I placed a smaller subtitle underneath using the red ABC stickers from the "Handmade" collection. Lastly, I placed some die-cuts from the "Buttercup" collection randomly across my layout.

Lily Bee Supplies:
Pattern Paper: 6x6 Tiny Tablet
Stickers: Buttercup
Stamps: Buttercup
ABC Stickers: Handmade
Die-Cuts: Buttercup
Index Cards

Other Supplies:
Gesso
Tiny Attacher
Twine
Mist
Ink
Thickers

Read more...

Final Day of Glue Arts & Epiphany Crafts Blog Hop

>> Friday, May 18, 2012

I can't believe it's already Friday! The week has flown by. Thanks for joining us as we've teamed up with Glue Arts & Epiphany Crafts this week. We've got even more fabulous layouts to share with you from the rest of the girls, and you won't be disappointed!

I love this beachy layout from Anna-Maria. I just adore yellow and blue together. She's mixed blues and yellows from our Double Dutch, Buttercup and Handmade Collections.


Melissa has used our Handmade line and I love the circles! And that she's documented herself...we need to do this with ourselves more often.


She's used Glue Arts Raisens for her 3D effect.


Sasha never disappoints with her detail. She's using our Buttercup Papers along with the Double Dutch Butterfly Stamp and Handmade Mixed Sticker.

I love the pinwheel and her stitching on her layout.

She's embellished again with the Epiphany Crafts Accessory Squares.


Patricia's came up with two fabulous layouts for us and some fun ideas using her Epiphany Crafts and Glue Arts Products.


Tip: I thought it would be a cute idea to use the flowers as starfish sprinkled along the bottom. I used the adhesive squares to attach the confetti to go along with the beach theme of the layout.


The Glue Glider Pro made it easy to make ruffles out of the polka dot pattern paper. I used some of the foam adhesive on the bit, photo corner and circles


Thanks to Glue Arts & Epiphany Crafts for teaming up with us. We hope you've been inspired and have some new ideas to work with the next time you do some scrapping. Have a great weekend! See you back here on Monday.

Read more...

Blog Hop Day 4...

>> Thursday, May 17, 2012

Happy Thursday! I hope you have been enjoying our projects this week and seeing how we've been using our products with Epiphany Crafts and Glue Arts. The three are a super combination together!

I'm so excited to share with you more fabulous cards today from Danielle, Julia and Kim.

First up today Danielle Flanders. Danielle is the Queen of Cards and I just ADORE how she has taken our Index Journal Cards and created them into a Handmade Card .

I love the Epiphany Crafts Bubble Oval she's used to embellish our the floral stamp from our Victoria Park Collection onto side of the card.


Our ABC Stickers are perfect to spell out any size title or message you want to share on the outside or inside of your card.


Danielle's cards are a perfect example of how versatile our Index Journal Cards are to use and not just for journaling!


Kim has created her card using our Bag of Bits and Index Journal Cards. She adhered her "Bits" using the Glue Arts Glue Glider Pro, 3/8” Raisen’s Adhesive Squares AND U CUT IT 1/8” Foam Adhesive.

She also embellished the card with the Epiphany Crafts Shape Studio Tool & Accessories Bubble Caps Round 14.


Next up is Lisa Day using our Buttercup Collection.


Lisa used the Glue Arts Raisens on the back to really make her Bag of Bits Banner's pop!


And last but not least are Julia's two beautiful cards. Here she's used the Index Journal Cards as an embellishment on the outside of the card and adorned it with the Epiphany Crafts Accessory.


Our Bag of Bits make is a snap to make a card in no time at all.


We've got another great giveaway for you. Epiphany Crafts is offering their NEW Pennant Studio Tool and Pennant Accessory's for one lucky winner. Go "LIKE" Glue Arts and Epiphany Crafts on their Facebook Pages Post on their Wall that Lily Bee Sent you. We'll choose a winner next Monday, May 21st and announce the winner here on the Blog.

Read more...