
Laughter: Start to Finish
>> Wednesday, June 15, 2011

Picket Fence: Veranda
Stationary: Mushroom
Lovely: Bonjour
Lovely: Trinket
Three Little Birds: Rub-ons
Light Blue Spray Ink
Grey Spray Ink
Stencil
Pop-Up Adhesive
Punches
Ribbon
Sewing Machine
Hello Everyone! I thought i would show you today a layout from start to finish. This particular layout started with a photo from CHA & a color scheme. I saw a magazine page with the colors of pink, grey, blue, & green. I thought it was so pretty i wrote it down on a sticky note & tacked it to my inspiration board.

I started with this photo of Linda Barber, Stacey Cohen, Kristen, Myself, & Piradee standing in the Lily Bee Booth at CHA. Even though Kristen is blinking, i still wanted to use this photo since this is the only picture i had of us. Using photoshop, i soften the tones of the photo before printing.

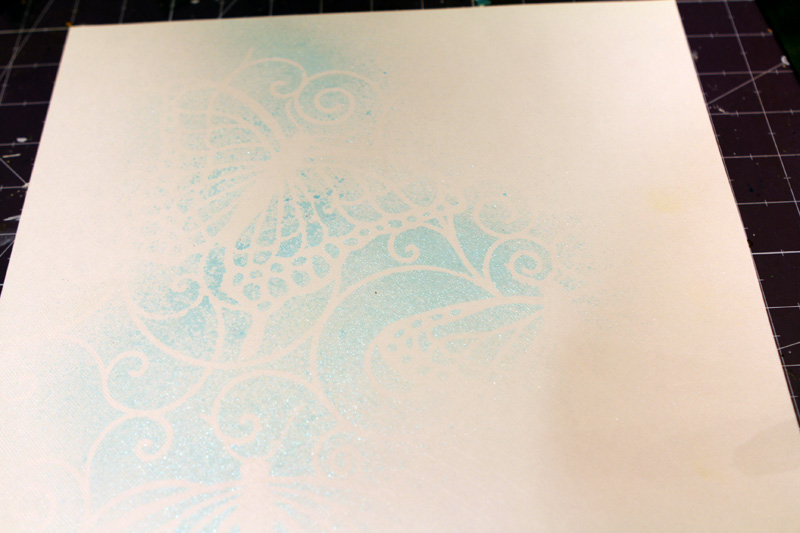
Next i grabbed a creamy cardstock as my background & one of my favorite stencils. I used a mini mister with the light blue spray ink for better control. As you can see in the second photo only parts of the butterflies have been misted.

Next after shaking up the grey spray ink, i removed the cap to drip the ink on the page. Carefully shake the nozzle with an up & down motion to get little drops on mists on your background. Repeat it all around the page.

I printed the photo 4 x 6. I punched the edges using a Corner Round punch to give it a softer look. It really can change the look of a photo.

Next i cut strips of pink, grey, blue, & green from various Lily Bee paper lines. These strips were only 5 inches in length so they would be just a tiny bit shorter than my photo. This would make the photo stand out on the page. I varied the width of the pieces of patterned paper, some being 1.25" to 1.5".

Next i punched out a few shapes from the leftover strip of green patterned paper & the pink Patterned paper. I used my anywhere punches as the shapes were solid & a bit larger than my other punches.

I knew i was putting the photo & strips of patterned paper on the right side of the page. I wanted to add a bit of balance to the left side but nothing too overwhelming. I love the Lily Bee Rub-ons so it was a perfect fit for the left side. I anchored the rub-on with a tiny strip of the same grey patterned paper (Stationary: Mushroom) using the backside.

Here's how the layout looked near the finish. I wanted to have something accenting each strip of patterned paper so i used punches, bling embellishments, and ribbon. You can see a trinket pin in the photo that i was trying to use but it just wasn't working so i left it off.

I decided that the punches need to be emphasized more. I was thinking about inking the edges but i really didn't want to add any color to them. I opted then for some foam squares to pop up the punches. This way you get to see the punches but the color all stays the same. it adds that bit of visual interest to the strips.

Before gluing everything down (punches, embellishments, etc) i added in some zig-zag stitched lines between the patterned paper strips to really anchor them to each other. I liked the look so much i also stitched the photo.

So to bring all the elements together & to have a place to journal, i penciled in lines about .25" around the 3 sides of the layout. After writing out my journaling, i then go back and erase those lines.
If you have any questions, please feel free to ask.
Lots of Love


4 comments:
gorgeous page ronda - and i love seeing how it all came together!
Ooh, so good to get a glimpse of your thought process. Love!
That's beautiful, Ronda!
gorgeous page ronda- loved your step by step process!!!
Post a Comment