Showing posts with label Maya Road. Show all posts

Simple Chevron Layout

>> Thursday, March 8, 2012


Chevrons are so in right now and I admit i totally love them.  Today i am going to share a quick way to create this beautiful design element with an old tool/fad that you probably already have in your stash.


It's time to break out the old photo corner punch.  Punch a bunch of corners out of the same paper.  Here i am using the Double Dutch line.  I knew i wanted 4 chevron rows and you will need at least 5 to 7 corners.  What's cool about this technique is you can use small scraps to create this look.


Make a row of three corners by taking the second corner to the first corner matching up the edges.  Add the third corner to create mountain peeks.


Now you are ready to add the bottom part of the chevron.  Turn the corner upside down and match up the "v" of the corner.  Add the next layer and suddenly you have a chevron.  You can keep adding the next layers until you create a length you want. Easy peasy chevrons!


 Enjoy!

Read more...

2012 Mini Album Tutorial

>> Wednesday, January 4, 2012


Happy New Year everyone.  It's Ronda today with a step by step detailing this adorable mini album for the new year.  This quick & easy mini could be used for multiple projects such as a goal journal, a One Little Word album, a monthly glance at your year, etc.  So many possibilities in one sweet little album. 

Supplies:
a variety of Lily Bee patterned papers
Lily Bee Alphabets
Lily Bee Happily Lost Stamps
two 4 x 6 Chipboard pieces
scoring tool
Paint
Binder Rings
Border Punch
hole punch
Sewing Machine


First you need to cut two pieces of 4 x 6 inch chipboard pieces to create your cover.  You can usually purchase these pieces fairly cheaply from your local scrapbook stores.  I usually have a stack on hand so i can create my own covers.


Choose your favorite Lily Bee Patterned paper for the cover.  Here i am using This & That Milk Bottle.  I just love that blue!  Adhere to the front of the chipboard, gluing in the center of the paper.  Why you ask?  Well i knew i wanted to stitch around the edges of the chipboard so i didn't want my needle hitting the adhesive & getting sticky. 


I added a thin paint layer around the edges of the album to give it some texture.  I love that it is quick & a bit rough.  Next i stitched around the edges of the cover.  Yes you can stitch through chipboard.  Just go nice & slow, using a long stitch making sure your tension isn't too tight.


Next i added a chipboard accent piece.  I painted the top of the butterfly using the same paint i used around the album cover.  Next i added a bit of clear glue & some German glass glitter.  You could also use regular glitter as well. 


Once i added the butterfly to the album i decided the solid orange background wasn't popping enough for me so i changed it up with strips of leftover patterned papers.  I added two green stick pins for the antennae which added that pop of color i needed.

I grabbed my Happily Lost Banner Stamp and stamped it on a piece of neutral patterned paper.  I went with the same color palette as the paint.  This way my title could really stand out.


This album is titled Reflections.  In order to get the position right on the banner, i first wrote out my word and found the center letter.  I work out from there to fill in the rest of the letters.  Sometimes i add the first letter so i know how much room i have.  You also have to remember you may have to adjust your "center" letter depending on the font size of the letters.


Next choose a variety of coordinating Lily Bee Papers.  I have a fun bright palette of colors choosing warm greens, yellows, pinks, oranges, blues, and a hint of black.  They make me happy!  You will need twelve 4 x 12 sheets of patterned paper plus one 4 x 6 piece.  These are going to be the base of your interior pages.


These 4 x 12 pages become pocket pages similar to the So Blessed Lily bee album i did in 2010.  Score your twelve 4 x 12 pages at 2 inches and at 6 inches.  Fold the page in half at the 6 inch score mark.  Fold the 2 inch score mark down & punch the edge with your favorite border punch. 


You can adhere the two sides down and create the pocket.  I like to stitch mine down by stitching all around the edges of the page.  Now you have 12 pockets for your mini album, one for each month if you so choose.   

I have created these journal inserts for my pocket pages.  You can download the pdf of the interior pocket journal cards from my blog.  I am planning on using this to capture my month's at a glance.  I will place a photo on one side of the page & the pocket page on the other side. 

Because of the way i am doing my photos, i needed a cover page.  Here i have two options for the interior cover for you.  One uses the the journal card on the cover page to create consistency.  The other makes use of the scraps of patterned paper.  I gave you this option because you would need to print out an extra journal card to use it on the cover. 


Here's the start of my interior pages. I plan on placing a collage of photos on the backside of the green paper, opposite of the January pocket that is a snapshot of my month.  Like i said above, you can use this album for multiple projects.  

Have a blessed New Year

Read more...

Day 4 - Creating a Poinsettia Ornament

>> Sunday, December 4, 2011


Hello Everyone.  Hope you are enjoying these days of inspiration from the Lily Bee Design Team.  It's my day to share with you a simple ornament you can make to adorn any tree.


I am using a 4 inch bottle cap as my base.  Trace around your favorite Jingle patterned paper for the center of the cap.  I am using the 6 x 6 Jingle Tiny Tablet since the patterns are smaller & the right feel for the bottle cap.  I also cut a smaller circle of another Jingle patterned paper to layer on top of this one.  I distressed the bottle cap with alcohol inks to give it that vintage feel.


Now let's build the poinsettia. This is one of my favorite Christmas flowers to make.  I created this flower technique years ago & still love how it looks.  First cut three 1 inch by 3 inch strips of patterned paper. 


Fold the strips in half lengthwise and in half again from top to bottom.  Using your scissors, cut in an arc from the outside to the fold part. This makes the point of the poinsettia.


Unfold the pattern paper and you get a “squashed”  oval.  Now fold this oval in half top down, you will see the backside of the pattern paper.  Fold one side towards the top.  Flip it over and do the other side. 


Fold in half again. Now holding the center, run your finger under the pattern paper to pop it out.


I like to use a plain glue stick and glue the “leaves” together.  Pinch & hold each leave together.


Next punch a 1.5 inch circle from the same patterned paper.  Using a strong glue, adhere all three leaves done to the center of the circle.  You can add a button center to your poinsettia to accent the flower.


Lily Bee Supplies
Jingle 6 x6 Tiny Tablet Papers
specifically:  Eggnog & Garland

Read more...

Lily Bee + Maya Road Blog Hop, Day 3

>> Friday, November 18, 2011

Happy Friday, everyone! Here we are on day three of our blog hop with Maya Road. How do we love their products! We think it combines fabulously with ours! What do you think? Let us know. We'd love to hear what you thought of this hop (or anything Lily Bee related!)

To wrap up this fun week with our friends, we have a few more gorgeous projects to inspire you to create this weekend!

by Kim Arnold
Lily Bee Supplies
Patterned Paper:
Heads Over Heels - Smitten
Heads Over Heels - Dreamy
 
Mixed Cardstock Stickers:
Heads Over Heels
 
ABC Stickers:
Head over Heels
 
Maya Road:
Chipboard banner pieces
Vintage Paper Roses
Wood Skinny Spools
Crystal pins
Crochet flower
Mist
 

Lily Bee Supplies:
Harvest Market: Peach Crisp, Black Licorice, Turtleneck, Pumpkin Seeds, Squash,
Mixed Cardstock Stickers, ABC Stickers
Memorandum: Boardroom, Mixed Cardstock Stickers, 
ABC Stickers, Journaling Index Cards

Maya Road:
Clear Transparensies
Kraft Mini Tickets
Love Chipboard Banner
Trinket Pins- Leaf
Kraft Library Cards w/ Envelope 
Jumbo Bottle Caps


Lily Bee Supplies:
Patterned paper:
BubbleGum - Head Over Heels
Tiny Tablets:
6x6 Memorandum
6x6 Head Over Heels
Memorandum Index Journaling Cards
Harvest Market Stamps
ABC Stickers: Head Over Heels

Maya Road Supplies:
chipboard buttons, crystal beads
 

We hope you've enjoyed this hop as much as we did! Please leave us a comment for a chance to win a nice early holiday present from us! We'll announce the winner next Monday, November 21. So you have all weekend to let us know how you are liking our blog hops!

Don't forget to drop by Maya Road's blog too! The projects have been so beautiful and inspiring! Plus they are doing a giveaway too.

Have a great day, and see you on Monday.

Read more...

Lily Bee + Maya Road Blog Hop + Sketch Challenge 4

>> Wednesday, November 16, 2011

Hello there! Welcome to day two of our blog hop with Maya Road!

Today, we have a combination of our blog hop and our Wednesday's Sketch Challenge. It's double the party! Double the fun!

Our sketch is brought to you by Ronda Palazzari.

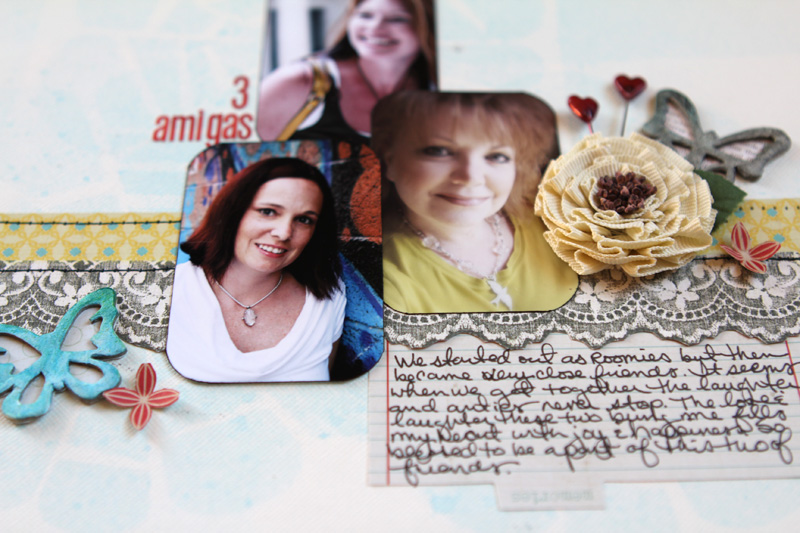
Who went on to create this gorgeous layout.

Lily Bee Supplies
Papers:
Memorandum Whiteboard
Memorandum Boardroom
Memorandum 9 to 5
Head over Heels Smitten
Lost & Found Sun Soaked
Memorandum Index Journaling Cards
Memorandum Mixed Cardstock stickers
Memorandum ABC Stickers
 
Maya Road:
Kraft journaling jotters
Butterfly chipboards
Trinket pins (Heart & Round Pearl)
Trinket Flower Medallion
Maya Mist: Blue Popsicle, Sunflower, Earl Grey

Then we asked three other designers to take a turn with the sketch and come up with a different take on it.

First, we have Cindy Liebel.


Lily Bee Supplies:
Pattern Paper:
Memorandum Lemon
Harvest Market Pumpkin
Stationery Grape
Head Over Heels Smitten (6x6 Tablet)
This or That Pretty Fabric (6x6 Tablet)
Jingle Merry & Bright (6x6 Tablet)
Chipboard Stickers
Lovely
ABC Stickers
Harvest Market

Maya Road:
Chipboard Mini Tree, Love Chipboard Banner & Leaves Sets
Other: jeweled brads, pearls, shape & border punches & machine stitching

This one is by Julia Stainton.


Lily Bee Supplies
Patterned Paper:
Heads Over Heels - Swoon
Heads Over Heels - Crush
Memorandum - Whiteboard
Cardstock Stickers:
Heads Over Heels
ABC Stickers:
Heads Over Heels
Clear Stamps:
Heads Over Heels
 
Maya Road:
Banner Mini Chipboard Pieces
Orange Sherbet Maya Mist
Black Doily Transparency
Kraft Tickets
Daisies Vintage Lace Trim
Chipboard Button Pieces
Mini Spools
Crystal Trinket Pins
Cream Winter’s Roses

And this one by Kay Rogers!

Lily Bee Supplies:
Harvest Market Hayride 
Harvest Market Pumpkin Seeds 
Harvest Market 6x6 Tiny Tablet 
Harvest Market Mixed Cardstock Stickers

Maya Road Supplies: 
Die Cut Kraft Doilies 
Kraft Doilies 
Kraft Envelopes - Rectangular 
Kraft Scroll Frame Journaling Tags 
Autumn Mini Chipboard Set 
Love Chipboard Banner

And now it's your turn! We hope we have inspired you enough to take on our Sketch Challenge!

The rules:
1) Use at least two Lily Bee products (any two).
2) Post your layout on our Facebook page (please include the title Lily Bee Sketch Challenge 4) -OR- include a link to your project in the comments of this post. Please do one or the other, not both.
3) The deadline is Tuesday November 30th, 9PM EDT.  We'll randomly pick one winner to receive some delicious Lily Bee products!
 
Leave us a comment today to be entered to win an early holiday prize from us!
 
Also, don't forget to stop by Maya Road's blog too, and see what they came up with today! We love what they've done with the combination of Maya Road and Lily Bee so far. Plus they are also doing a giveaway!

Thanks for dropping by!

Read more...