Focus On: Christmas Town

>> Monday, February 28, 2011

Hello everyone! Hope you had a good weekend. Today, we taking a closer look at Christmas Town. Yes, it's only February (for one more day, yikes!) but this line is good for so much more than the holidays. Yes, it has some Christmas specific details, but mostly it's beautiful deep red, sharp black, lovely blue and green.

Piradee Talvanna created a super cute layout about her pup. The mostly black and red layout puts the focus on the fluffy dog. And the few touches of yellow gives the line an entirely different look.


Lily Bee Supplies Used:
Christmas Town Pattern Paper - Christmas Window and City Side Walk


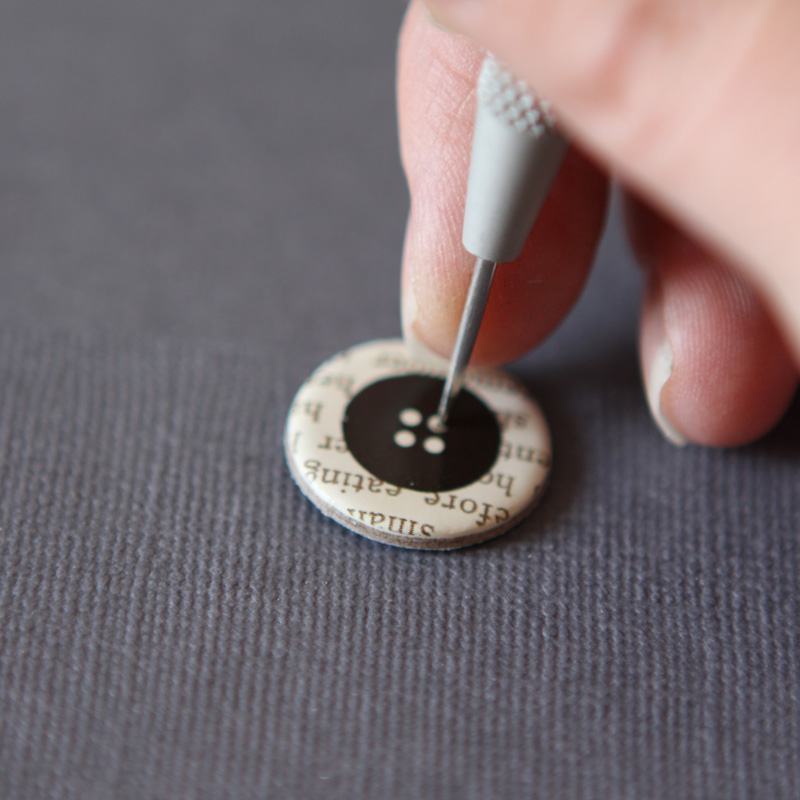
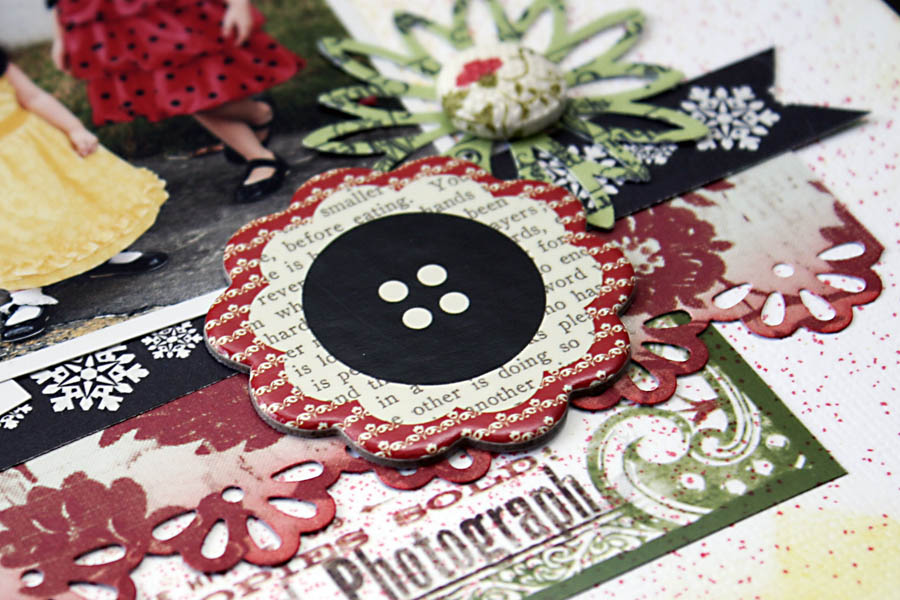
Julia Stainton scrapped some photos of her darling youngest just chillin' while on vacation. I'm loving those florets topped off with the chipboard buttons.


Lily Bee Supplies Used:
Christmas Town Pattern Paper – Sleigh Ride, Night Divine, Town Tree


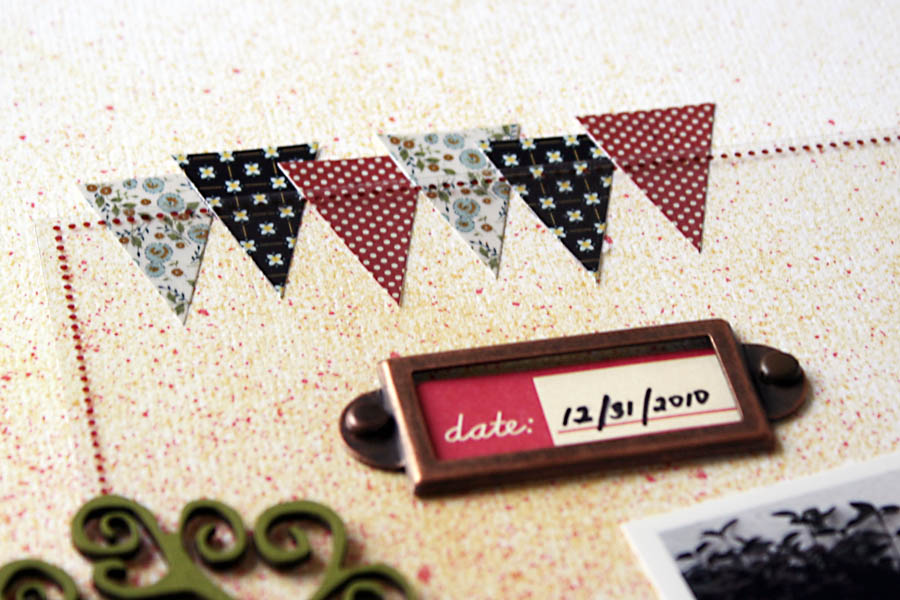
Iris Babao Uy's layout features Spring-y photos of her cute daughters in adorable frocks. I really like the frame with the photos slightly offset. So many pretty details to look at!


Lily Bee Supplies Used:
Christmas Town Pattern Paper - Christmas Window and City Side Walk


Hope you are inspired to use Christmas Town in a non-holiday way! If you do, please share with us by linking us here on the blog, or on our Facebook page.

And don't forget about our first challenge! There's still time to participate. And we hope you do!

Have a great Monday!

Read more...

Going in Circles

>> Thursday, February 24, 2011

Anyone else feel like they are going in circles these days? I keep thinking life will slow down but it just doesn't seem to.

While I really don't like going in circles in my daily life, I love using circles in design. They are so fun! Who says it's hip to be square?! I think circular is where it's at.

I've been having lots of fun with circles so today I have two circle themed card designs to share with you. If you like sketches, I've included those too for you to have some fun with.

The first card is a grid of circles. I love my circle punches and this is a great way to combine lots of fun Lily Bee design prints and patterns together and have the project look cohesive. By the way, did you see yesterday's Punches Challenge? So fun!


Lily Bee Products Used:
Happily Lost Pattern Paper: Sun Soaked, Hammock, Amazing Views, Villa, Stroll


I could just eat up this Happily Lost line with a spoon. The colors and prints are sooo gorgeous. Below you'll find the sketch for this design.While I was in the circle mood, I decided to create a fun circular shaped card. This one is created with the new Picket Fence line and some circle dies. So fresh and pretty for Spring!


Lily Bee Products Used:
Picket Fence Pattern Paper: Porch Swing, Fresh Air, Veranda, Al Fresco


How about another sketch to get you creating?


Are you going in circles? Spin it into a good thing with some fun circular designs.

Happy creating!

Read more...

Lily Bee Challenge--Punches

>> Wednesday, February 23, 2011

We are excited to share with you a new feature that will regularly appear on the Lily Bee blog-- Challenges!!!

Every other week a Lily Bee Design Team member will present you with a challenge. And of course, fabulous Lily Bee prizes are at stake.

So, are you ready?? Your first challenge, if you choose to accept it, is to create a layout using:
1) at least one punch (any kind), and
2) at least one Lily Bee product (any kind).

Lily Bee Products Used:
Hello Sunshine Pattern Paper: fly a kite, savannah, posies, twirl, picnic, blueberry pie.
Hello Sunshine 12x12 Rub-ons
Hello Sunshine Chipboard Stickers
Domestic Bliss Chipboard Stickers

For my layout, I used a 1.5" Circle Punch with the Hello Sunshine Papers and Kraft paper. I cut the circles in half in order to create a scalloped layer banner. I added my journaling to the kraft circles. The rub on was the perfect element to separate my photo with the circles.

Sound like fun?? In order to be entered into the contest, post your layout onto the Lily Bee Facebook Page OR include a link in the comment section of this post to your blog and/or other gallery where your layout appears. Please be sure to include "Lily Bee Punch Challenge" with the title of your layout!!

We will choose one lucky winner by random on Wednesday, March 2 at 9:00pm EST. The winner will receive the ENTIRE Hello Sunshine Collection!! Good Luck!

Read more...

>> Tuesday, February 22, 2011

Hi everyone! Hope you guys have been having a great week so far. Thought today I would share a layout that I've recently created for one of my best buddies from high school. I'm always in awe everytime that we all get together - it still feels like we are in high school.

For this layout, I used the new Happily Lost Collection... aren't these colors just dreamy!!! I'm just loving the soft bold colors and the vintage design and feel of these papers (the strip pattern paper has a gorgeous flower watermark design).

Photobucket

Photobucket

And also using the chipboard stickers from the Lovely Collection and Hello Sunshine to finish off the layout (these are my all time favorite ever - just love that text on these and those super cute button).

Photobucket

Lily Bee Supplies Used Include:
Happily Lost Pattern Paper - Good Book
Happily Lost Pattern Paper - Stroll
Happily Lost Pattern Paper - Sun Soaked
Lovely - Chipboard Stickers
Hello Sunshine - Chipboard Stickers

Thanks for stopping by everyone!!
Photobucket

Read more...

Focus On: Catching Fall

>> Monday, February 21, 2011

Happy Monday! And Happy President's Day for those of you who are in the US.

Today, we are taking another look at Catching Fall. This yummy line was released in CHA-S 2010, and as you can tell by its name, it's a Fall themed collection. But the yummy orange, blue, red, brown color scheme can be used for layouts about anything!

I challenged a few of our designers to use Catching Fall in a, well, non-Fall way.

Jill Sprott took that challenge and created something else entirely unique. Love how she thinks! She colored in the b-side of Pumpkin Pie paper with the colors from collection with the addition of green. It's a perfect extra bit of color to match the green shirt in the photo. Then she used a template and created that cute scalloped edge by misting all around the layout with more green (and a bit of orange and red.) Let's not forget the bit of green stitching that ties everything together. It's a layout full of energy and a playful feel.


Lily Bee Supplies Used:
Catching Fall Patterned Paper  Fall Festival https://www.huntcal.com/ecom/show/lily?id=100
Catching Fall Patterned Paper – Cashmere Sweater https://www.huntcal.com/ecom/show/lily?id=102
Catching Fall Patterned Paper – Pumpkin Pie https://www.huntcal.com/ecom/show/lily?id=103
Catching Fall Patterned Paper – Cider https://www.huntcal.com/ecom/show/lily?id=104
Catching Fall Patterned Paper – Flannel Sheets https://www.huntcal.com/ecom/show/lily?id=99
Catching Fall Die-Cut Frames  https://www.huntcal.com/ecom/show/lily?id=111

On the flip side, Lisa Day's layout is all calm and serene, to underline the adorable photo of her kids sleeping. This layout has so many lovely details. (As always, you can click on any photo to see it bigger.) Little pearls, ribbons flowers, cream buttons, and that amazing piece of lace! The lace and the punched "lace" paper border emphasizes the lacy blanket the kids are using, as well as the lacy pattern on the papers. Such a pretty layout!


Lily Bee Supplies Used:
Catching Fall Patterned Paper – Cashmere Sweater  https://www.huntcal.com/ecom/show/lily?id=102
Catching Fall Patterned Paper – Pumpkin Pie  https://www.huntcal.com/ecom/show/lily?id=103
Catching Fall Cardstock Stickers   https://www.huntcal.com/ecom/show/lily?id=114
Catching Fall Die-Cut Frames  https://www.huntcal.com/ecom/show/lily?id=111

Katrina Huerta's super cute layout takes Catching Fall in a entirely different direction. How darling are those photos? She used pops of red all over (the flower, the tag to the upper right, swirl to the lower left and red number on the lower right) to emphasize the red hat in the Jessie costume. The spots of the bright red totally changes the look of Catching Fall. See how versatile this line is?


Lily Bee Supplies Used:
Catching Fall Patterned Paper – Cashmere Sweater  https://www.huntcal.com/ecom/show/lily?id=102
Catching Fall Patterned Paper – Pumpkin Pie  https://www.huntcal.com/ecom/show/lily?id=103
Catching Fall Patterned Paper – Cider https://www.huntcal.com/ecom/show/lily?id=104

And as always, we'd love to see what you are creating with Lily Bee products. Please link us to your projects here or on Facebook.

Thanks for joining us today!

Read more...

Lots of Love

>> Friday, February 18, 2011

So by now you have realized Love is our theme this week. The great thing about love is there is never enough of it, you can always have more. Love comes in different sizes & shapes too. So today i thought i would highlight friendship love. It was my birthday on Sunday...the big 40. My friend Jessi asked me what i wanted and i told her just here. Since she lives in Canada, it was quite a big present to ask for but she happily agreed. We had a blast touring around Denver and just being together. It was amazing and one of the best presents to have...the gift of friendship, the gift of love.


This & That Brooch
This & That Postcard
Happily Lost Good Book
Picket Fence Fresh Air
Picket Fence Cardstock Stickers
Domestic Bliss Chipboard
Lovely Rub-ons


I wanted to point out some little details to you & give you a few tips. I combined the banner stickers with some punched hearts to create my banner. I love adding in bits & pieces to the banner like hanging the hearts.

To tack down the baker's twine, you can use a little dab of Helmar's Acid free glue..it dries clear so you don't see it. It's a good option instead of stitching it down in places.


To add a little detail to the chipboard button, i first punched holes in it with a paper piercer and then add some floss to the center. It looks so cute with the touch of red.

sending you lots of love

Read more...

Good Fortune...

>> Thursday, February 17, 2011


A little something for my three favorite people in my life right now, a little Valentine's love filled with good fortune. Of course, I couldn't resist Picket Fence for this project!! I filled up these "take-out" boxes with lots of chocolates, lip gloss for the girl and a mini game for the boy.


I made paper fortune cookies, each one stuffed with a little love note or message. Simple messages like, You're so sweet and Hugs & Kisses. Some fortune cookies had favors, such as, 15 minute back rub or a free pedicure.

This was a last minute approach to gifting this year, but all were delighted & enjoyed their chocolate treats :)

Picket Fence - Seize the Day
Picket Fence - Porch Swing
Picket Fence - Cottage Garden
Picket Fence - Al Fresco
Picket Fence - Fresh Air
Picket Fence - Veranda
Christmas Town - Chipboard Stickers


Read more...

Love Is the Thing

>> Wednesday, February 16, 2011

Oh! if it be to choose and call thee mine,
Love, thou art every day my Valentine.
-- Thomas Hood, “Sonnet for the 14th of February” 


Every true lover knows what I know: Valentine's Day isn't about that one day out of 365; it's all about the love that can't be confined to 24 hours, a love which, if we are lucky, surrounds us every single day.

Yep, love is the thing.

With that in mind, I created a layout with my perpetual Valentine in mind, and I'll be happy to share how it all came together (the layout, not the Valentine -- that was just plain kismet).  It all started with digging deep into my Lily Bee stash and pulling together a bunch of papers, including papers from past and present lines. Lily Bee love is timeless, after all!

Patterned Paper:
Chipboard Stickers:

True to the nature of love, this layout was not really planned.  It began with a punch, actually,

and then, boom -- it hit me.  As I started punching out hearts,  I got the idea to base the layout around heart-shaped spaces.

I set aside the actual hearts for another purpose (read more about their fate later in this post) and decided to use the heart-shaped spaces as frames and masks.

After resizing a few lovey-dovey photos to 1.5" x 1.5", I placed them behind the heart frames (which I had trimmed to 1.75 x 1.75"), and very lightly distressed and inked the edges.


After assembling the frames and adding torn strips of Lily Bee patterned paper behind them, I took a second look at the negative spaces left behind from all of that heart-punching, and got it in my head that some misting and painting were in order.  If I had actually planned the layout, I might have done this part first, but if you're a go-with-the-flow kind of gal like me, then this step arrives whenever it's good and ready.


The blue and pink hearts that you see on the layout are the result of near-randomness.  In some cases, I swiped pink or blue paint over the spaces that you see above, and then misted the rest with pink or blue ink. In other cases, it was vice-versa, or just paint, or just mist.

I then got to work adding accents to the layout, including this really-quite-pretty Lily Bee chipboard flower, with a charming little button center.

I also added an extra burst of color to the chipboard heart below by spraying it with layers of red, pink, and white mist, and letting them all swirl together.  I lightly pressed a piece of paper over the heart after a few minutes to get rid of some of the excess, and used a heat gun to seal the deal.


The journaling was added at the very end (a very bad habit of mine, actually), and ta da!  A layout worthy of my happy scrappy love...and hopefully yours, too?

Oh, and I didn't forget about the scattered hearts I left behind.  I sewed them together vertically to create a love-ly little garland to hang over my doorway.


Even the shadows are lovely!

Read more...